I gather from Twitter that some people find it interesting to follow my approach and progress when building a new model. So here’s a blog post where I will show how a project comes together, with lots of illustrations.
My starting point is to gather references, particularly high resolution photos, and plans with dimensions. Fortunately this one is covered in the excellent “Rockets of the World” by Peter Alway. It’s not highly detailed, but I find if you can get the overall dimensions of major features correct, then it’s not too tricky to fill in the rest from good photographs.

It’s not easy to find a copy, but well worth the effort.
Getting Started
I’m using Lightwave 3d software. The modeller in particular is a bit dated, but it’s the tool I know best. I think the techniques used here will apply pretty well to other software too.
I start with the widest cylindrical section , and bevel and taper. A great many rockets can be largely modelled with disk and bevel tools!
I’m using 120 sides for the cylinders, I like multiples of 12 as it makes for useful symmetries.

It’s not really visible on the real thing, but there’s a tank down the middle of the first stage. I’m including it as it’s easy enough , and I might want to show the structure later…
 Core tank
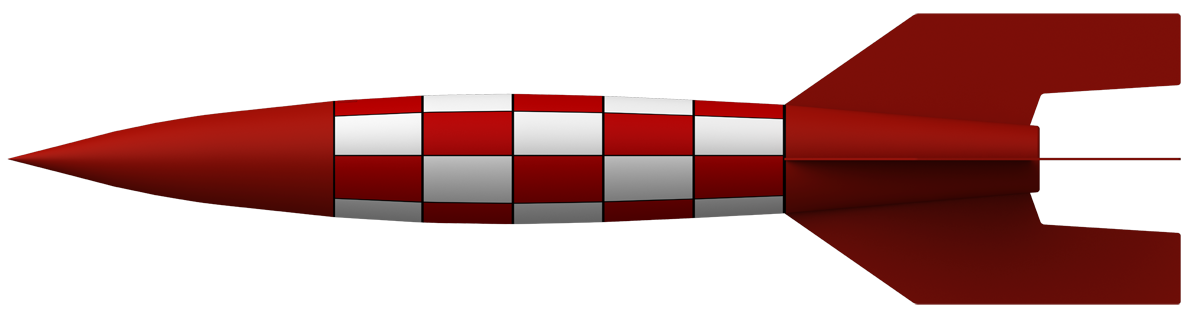
Next up, add the 8 alternate black and white tanks around the core tank.

Already the distinctive look of a Saturn 1B is apparent! I’m using the grey texture as a marker to show which areas will get stringers later on.
Base and fins

Next up, add the base, and some place-holder fins. It took me a long time to develop a style that let me get the shapes in roughly to start with, and refine details as I went along. Time for the first test render:
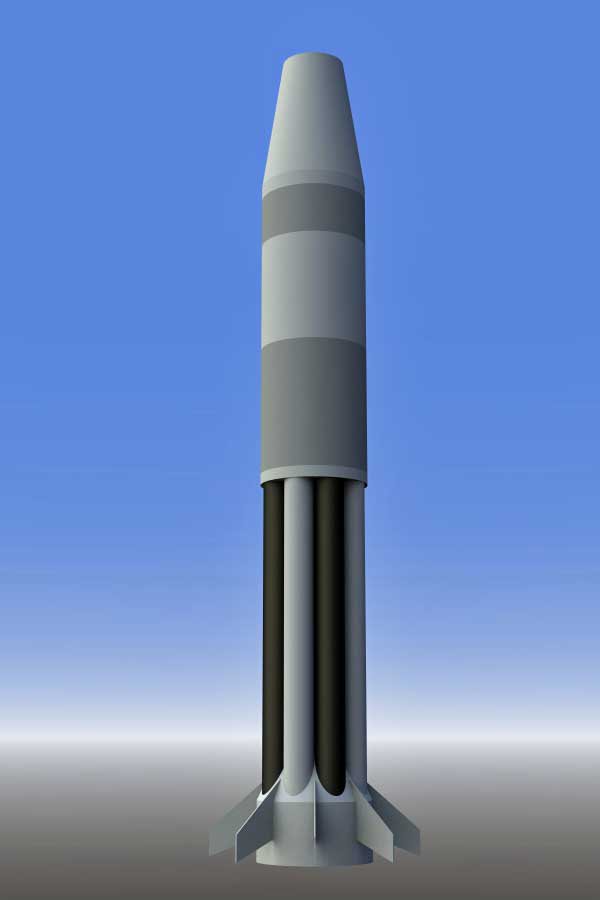
Rocket Engines
I really dislike doing rocket engines. It’s often seriously difficult to get all the pipes passing close to each other without overlapping. Most of the nasty plumbing is not exposed in the Saturn 1, but there is an aspirator, (the bulge on the side), which is tricky to add nicely.


Here’s a full set with the aspirator. The number of ridges is not correct, (or close to it), but I don’t intend to get very close, and too fine detail is a pain to render well in distant shots.
I later found out that the inner engines don’t have aspirators, and look different! I’ve made a note of that for a future fix.
Starting on the stringers
In case anyone does not know, stringers are the ridges along the side, which provide strength to the hull. They are hollow – I don’t intend to get close enough for this to show clearly, but what the heck, I’ll do it that way. I often put more effort into repeated elements as the benefits of accuracy are also repeated!

Note that I am using different surfaces for the black and white parts, not one surface with a colour map. This keeps the boundaries nice and sharp.
Basic textures
I generally do the surfaces as I go along, once I think changes to the geometry won’t mean redoing it. It also helps with a strong sense of progress as the look starts to come together!
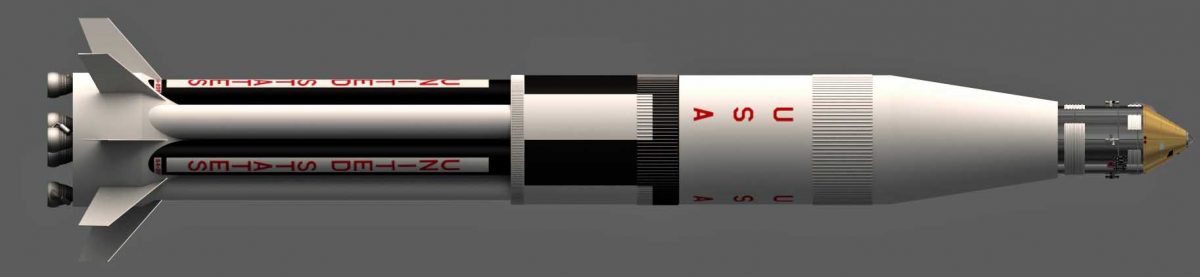
Wherever possible I like to use actual fonts inside a PSD format image for labels. You might not get the exact same look as the real thing, but because Photoshop stores them as fonts, you can get as close as you like without pixelation.

In this case the USA is done as a font, and the “United States” is an image map, (for now). Also, in case anyone is interested, I use a mix of Photoshop Elements and Affinity Photo for image editing. I’m in the process of moving over to Affinity Photo, which is massively more powerful than PSE, and cheaper too! It even runs nicely on an iPad…

I also downloaded a basic Apollo command module from the Foundation 3d site, by Shrox, and sat it on top! Again for those who do not know, the Saturn 1B used much of the same technology as the more famous Saturn V moon rocket, and was key to testing the manned modules before the Saturn V was ready for flight.
End of Part 1
I think that’s probably enough for part 1, part 2 will follow as I make more progress.
Referred to by its detractors as ‘Cluster’s Last Stand’ (or more accurately the Saturn I) owing to the arrangement of its eight Redstone Tanks around a Jupiter Tank in the S-IV. IIRC while this made the Dry Mass rather high, it was a very strong one that could handle uprating easily enough – relatively speaking – with some designs adding Titan UA1205s & 1207s to push the payload right the way up. More than double in some instances.
Really makes you wonder what they could’ve done with it had they stuck with it…
Great build – Do you have STL files available for 3D printing?
Thanks…
I don’t give access to my models to others.